
Manage Multiple List of Contacts on a Single OS X Account [Guide]
Yes, we all appreciate that MacBooks cost a lot and in many households, a single MacBook can be used for different purposes. So if two or more people are using the same Mac OS and they don’t want to share their contacts and want to remain in their own list, then what do they do? They can use contacts to synchronize the contacts between the different iOS devices, but which is the best method to do so?
There is an easy way to use multiple databases by using groups. Groups allows you to maintain different lists of contacts by sorting them into different groups that don’t intermingle with each other.
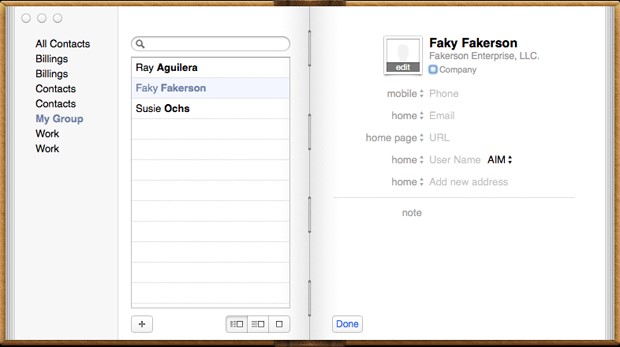
To create groups, simply follow the following simple instructions. Go to the contacts app and go to File> New group. By selecting this, a new group will appear at the left hand sidebar. Edit the name to suit your need. After the group has been created and named, you can now drag the contacts that you like in the group. You can import contacts from any list of the detailed contacts from your iPhone or any other i-device you own. The positive point of the groups feature is that you can create as many groups as you want for multiple members of your family or the workplace. If there are 5 iPhone users, then you can create 5 user groups in which their contacts will be saved. Then these contacts will be synchronized with that person’s iPhone.
It is a very simple method which will ensure that the contacts of the users will not be shared by other group’s iPhones and thus better management of contacts can be achieved. Your wife won’t be able to see your contacts and vice versa. However, all of the contacts will appear in the “All Contacts” category.
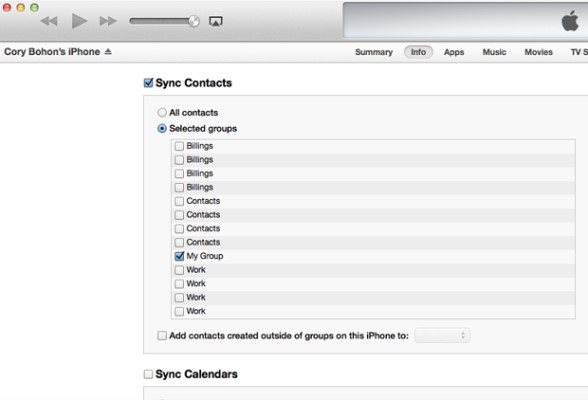
When you are ready to synchronize your device with the Mac, head over to iTunes, select your device then the info tab. Once you have reached this, be sure that “Sync Contacts” has been checked. Then select groups to synchronize and then you are good to go.