
How to Turn Windows 8 PC into a WIFI Hotspot- Guide
If you have paid for a wired connection and not WIFI or your router has stopped working you can still share your computer’s internet with you smart phone, tablet or any other device that uses WIFI. While doing this was incredibly simple on Windows 7, Microsoft has silently removed this feature of ad-hoc networking from Windows 8 and 8.1. Now either you have to follow some steps involving the use of command prompt or use third party apps to do it. Here are a few things you can do.
Method 1
- Press Win+X and launch the Window’s Command Prompt (allow administrative permissions)
- Enter the following command
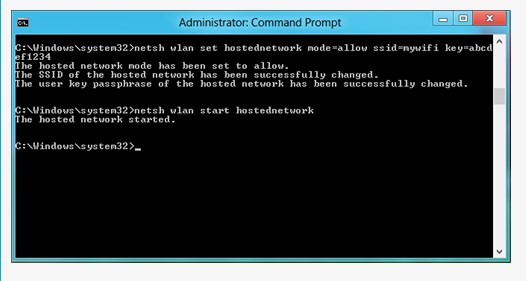
netsh wlan set hostednetwork mode=allow ssid=MarkWilson key=Lifehacker - To use a different name, change SSID. Change password too (recommended) using “key”.
- Start the virtual adapter you just created above by running the following command
netsh wlan start hostednetwork
- After starting the adapter, go to Network and Sharing center in control panel and look for the network adapter you just created and click it
- Scroll to properties, go to sharing tab and then check the “Allow other network users to connect through this computer’s Internet connection” box
- In the drop down menu, select the network adapter and you are all done, click OK and close the window. WIFI hotspot is ready.
Method 2
This method uses a third party app for creating WIFI hotspot network but don’t worry. This app is tested, is ad free and open source so it won’t do any harm to your machine.
- Click here to download the App called Virtual Router Plus
- After downloading, extract and launch the app (No installation required)
- In the window that appears enter the name you want to give your network in SSID slot
- Select a password (minimum 8 characters)
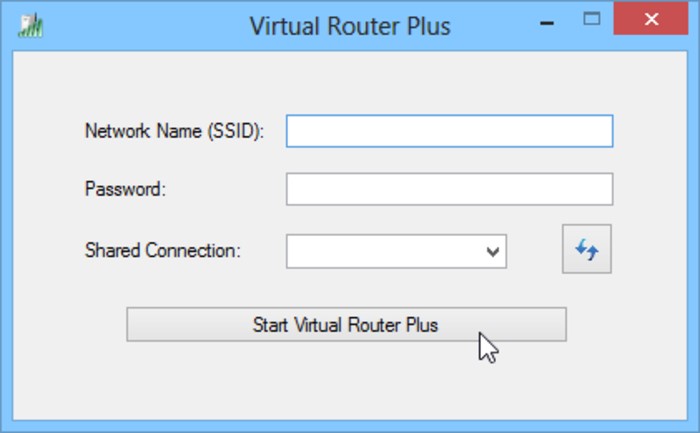
- If you are using more than one connection, select the network you want to share and click start
- All done, just search for the network you just created using any device that uses WIFI, enter your password and connect to start using shared internet
Method 3
This method again involves the use of a third party app called Thinix to create a virtual network. Thinix is a premium software but you can always use its 7 days trial version before deciding whether or not you want to buy it. Using it is incredibly simple and does not require much effort to setup. It is secure and uses WPA2 encryption to secure you WiFi connection.

- Download Thinix from here.
- Run the setup, click next to everything until you find finish.
- After the setup is complete it will launch itself automatically and prompt you for network name and password
- Enter a network name and password (with at least one alphabet and one numeric character in it)
- Click start network and you are all done.
Must Remember
In all the methods mentioned above your machine needs to stay awake. You might need to go to power settings and change the time after which your computer goes to sleep. In case your computer goes to sleep or hibernate, you connection will break and you will have to turn the device on, stop the connection in case its status still shows up to be running and then start the network again.