Yes, patience is a virtue, but definitely not when it comes to getting your work done online. The same goes when you are hanging out with friends on social media, playing online games among other ‘recreational online observations’. No one wants a slow internet connection!
Although internet speed has been on the increase, it is only smart and fair to want bump things up whenever and however you can. For that reason, we are going to share with you a minor tweak in your DNS that will give you an extra boost on your connection speed.
ISP’s DNS v/s. Google’s Public DNS
Usually, your Internet Service Provider (ISP) sets the DNS of your connections. Sometimes, this is not up to your level of satisfaction and leads to some occasional slow internet connections. Switching from your ISP’s DNS to Google’s public DNS will give you that extra boost for a faster connection.
Other than just improving your internet speed, using Google DNS over your ISP’s DNS lets you bypass government blockade on certain websites in your country. You can also achieve this by using other public DNS other than the Google DNS. That is assuming the blockade was set based on DNS.
It is also useful on your website. Say you had to change your site’s nameserver; it is the Google DNS that will replicate these changes the fastest. Thus, by using Google DNS, you will see the site (its new location) much more quickly.
Switching to Google DNS in Windows 10 PC
Go to ‘Settings’ > ‘Network & Internet’ > ‘Wi-Fi’ under ‘Related Settings’ and click on ‘Change adapter options’ select your network connection and right click.
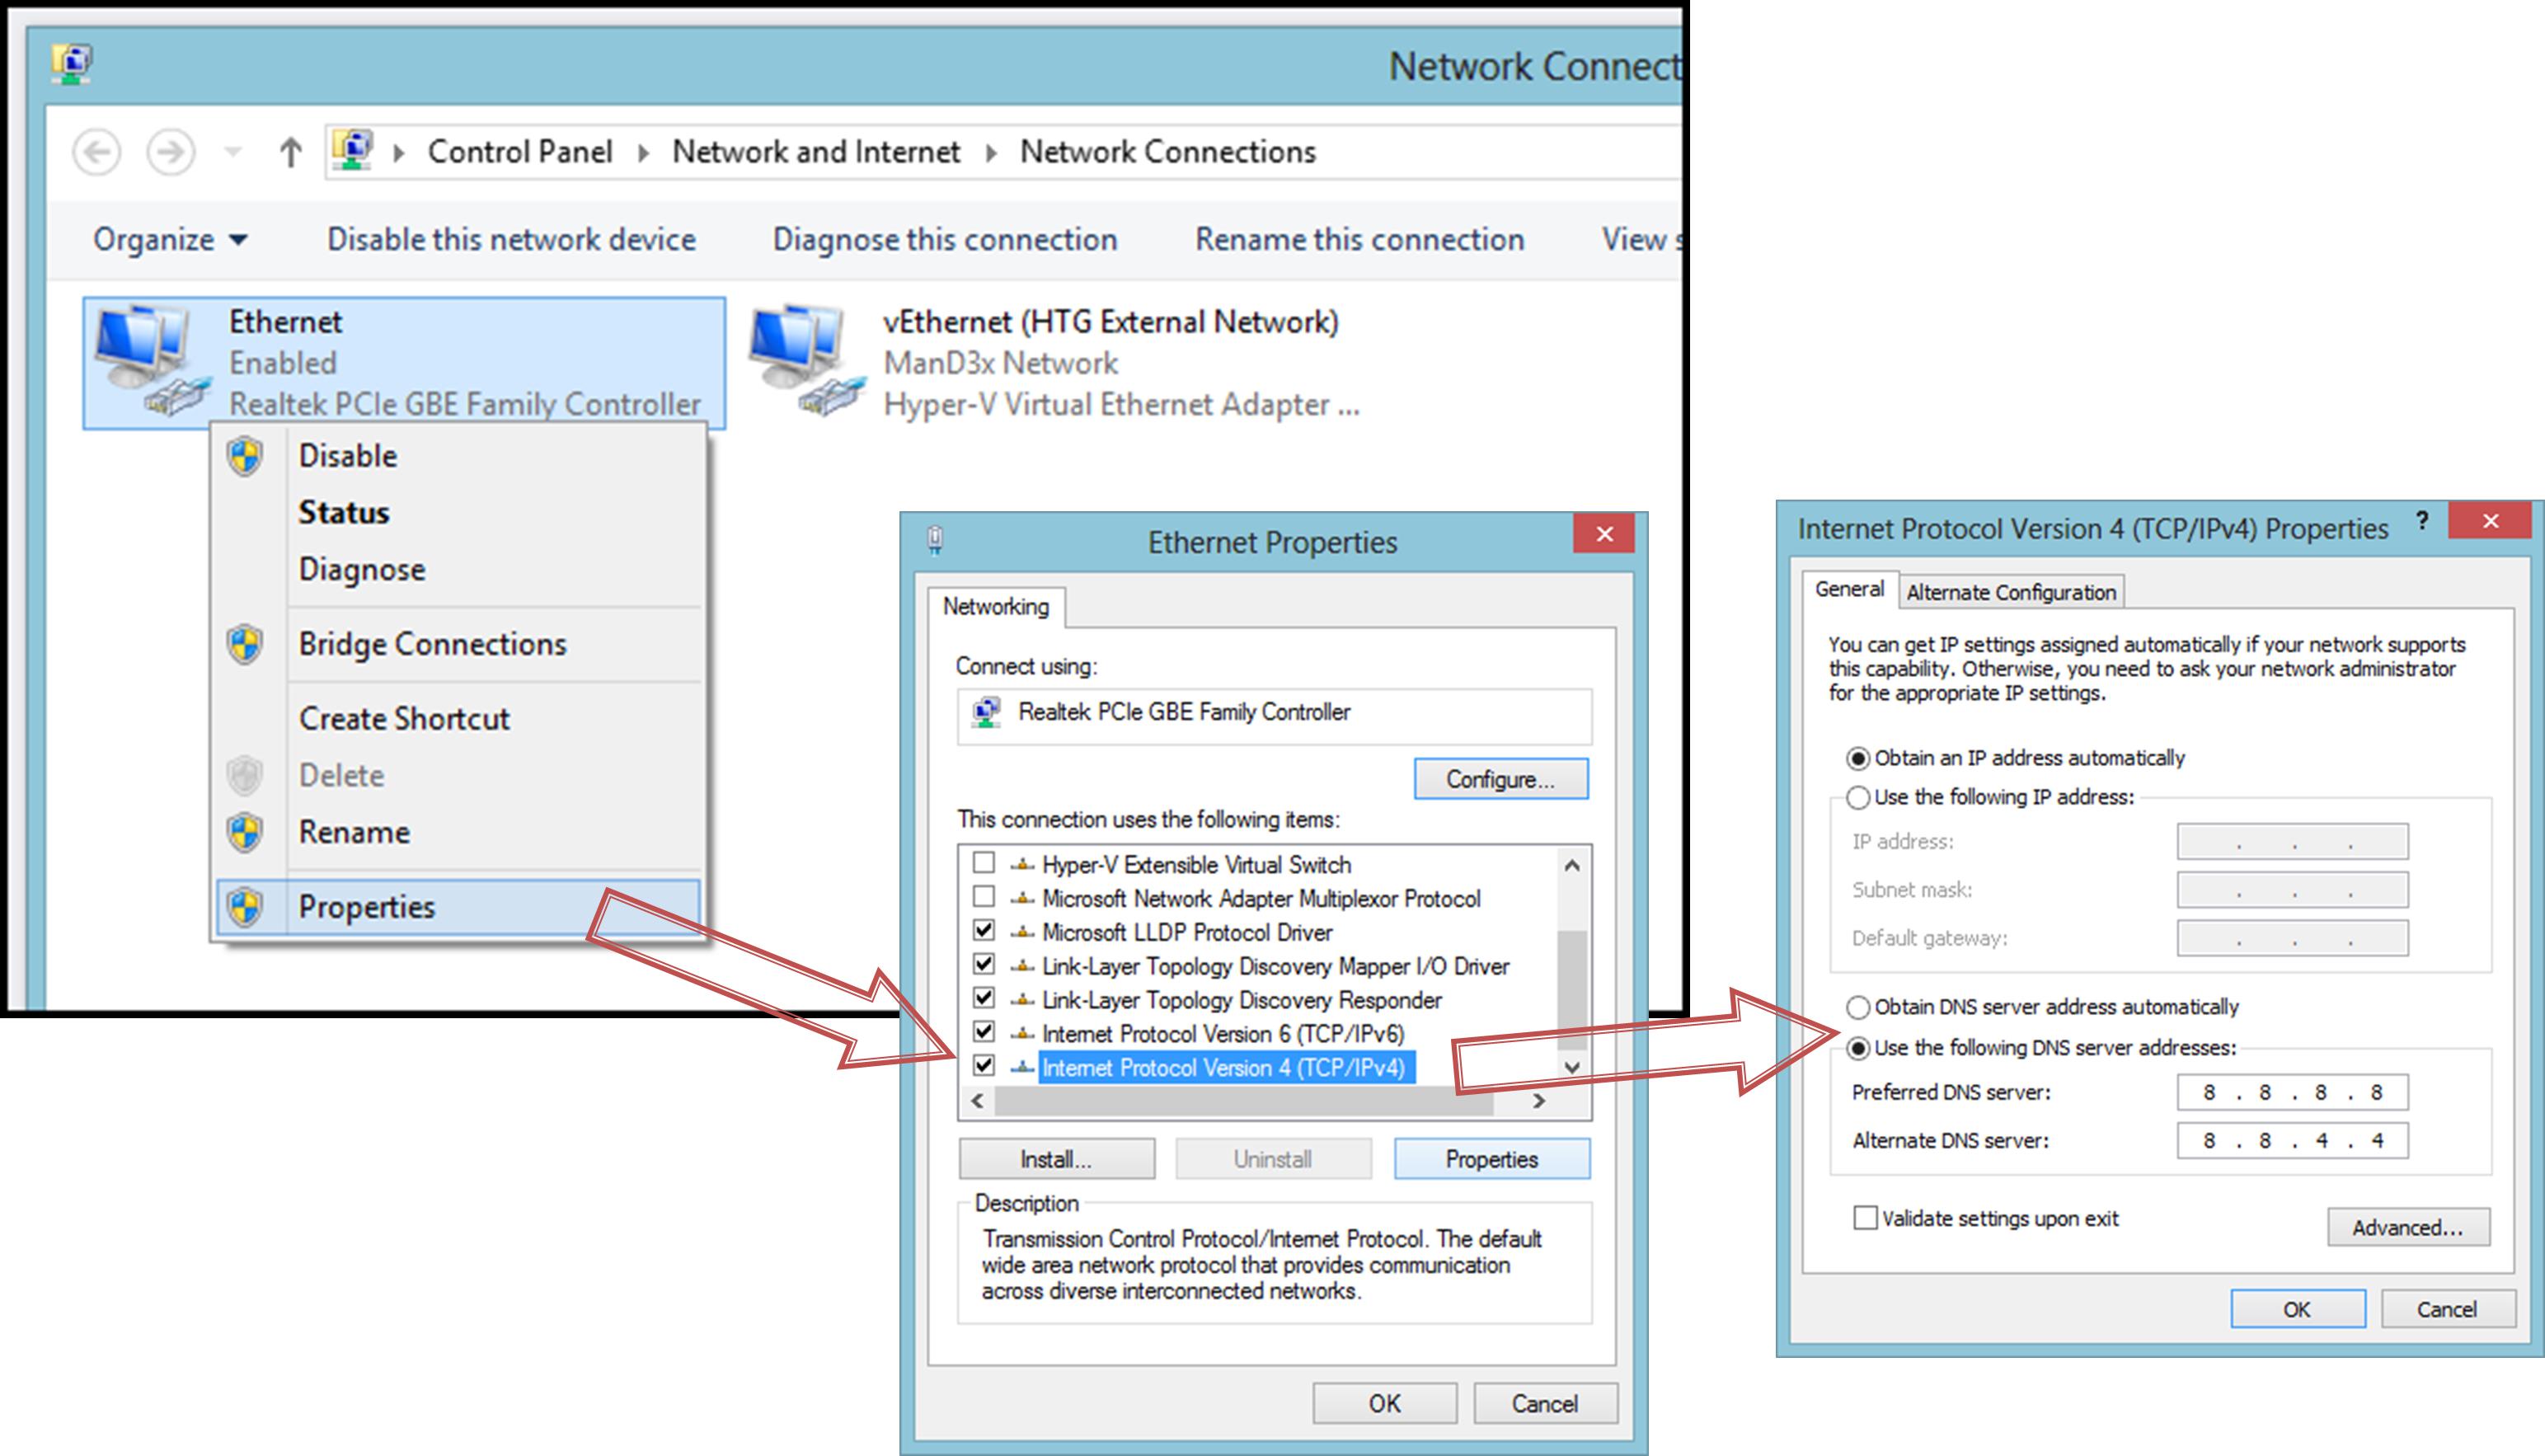
Go to ‘Properties’ and scroll down to and select ‘Internet Protocol Version 4 (TCP/IPv4)’ then click ‘Properties’.
Under the ‘use the following DNS server addresses’ insert the Google DNS as 8.8.8.8 followed by 8.8.4.4 Should be easy to remember, right? Then click ok, and then enjoy the faster internet and browsing under Google DNS.
For more details on the topic, head on to this link.