
How to Disable UEFI Secure Boot in Windows 8 and Windows 8.1?
The latest PCs with Windows 8 or 8.1 installed on them, contain UEFI instead of BIOS. UEFI contains a secure boot feature which loads only those boot loaders that are registered and signed into the UEFI hardware. This security feature provides an additional layer of security to your system. However, you will not be able to dual boot your Windows 8 system with Linux. You need to disable UEFI secure boot for making your system dual boot.
Disable UEFI Secure Boot in Windows 8
Secure boot can be easily disabled in Intel-based systems. It is quite simple to disable secure boot. Accessing UEFI is not as easy as with BIOS by pressing F10 or F12 when your system boots up. You can access UEFI settings from within Windows. Follow these steps to disable secure boot feature.
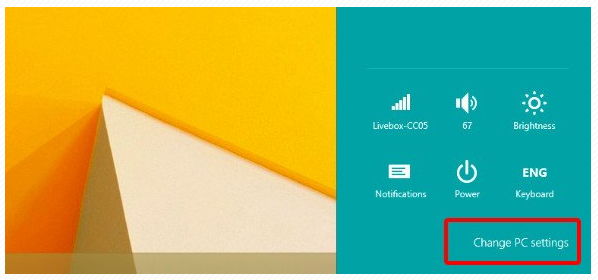
Open the Settings charm in Windows 8 by pressing Windows+I keys. Click on the “Change PC Settings” option.
Windows 8 and Windows 8.1 contain slight difference in PC settings. You can easily use the respective procedure described below.
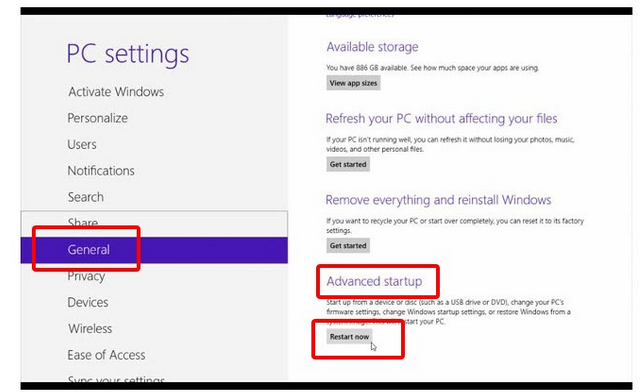
For Windows 8, go to General PC Settings and then choose the option of Advanced startup. Then, click on Restart now.
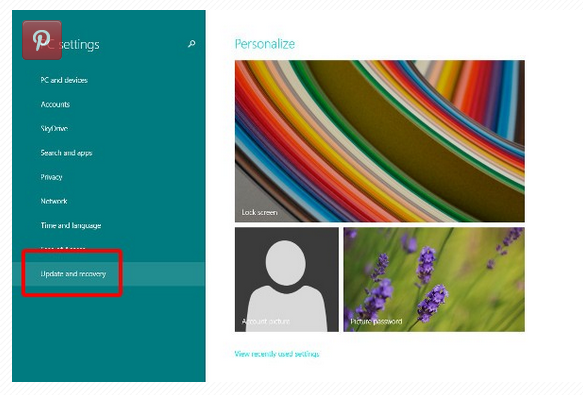
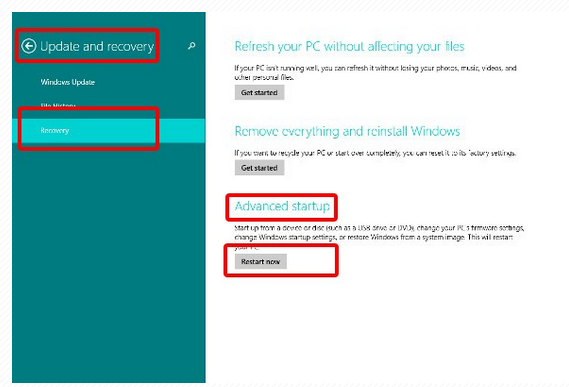
In Windows 8.1, you need to go to Update and recovery from the left sidebar.
Under the Advanced Setup, click Restart Now.
It will not restart after it. It will offer some option that you could see on next booting of your OS.
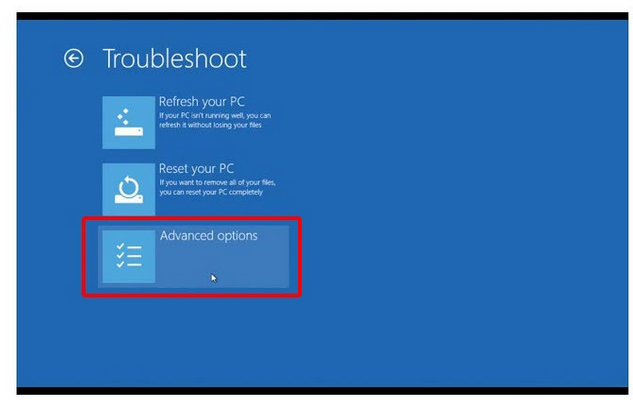
Once you have clicked on the Restart Now button, you will be presented with some options to choose from the next screen. Choose the option of “Troubleshoot”.

In the Troubleshoot menu, choose Advanced options.
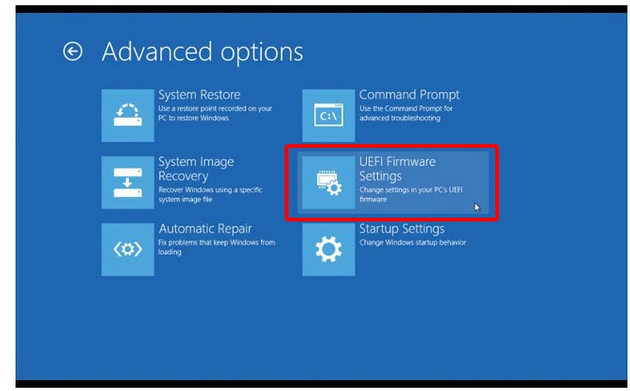
Choose UEFI Firmware settings from the Advanced options menu.
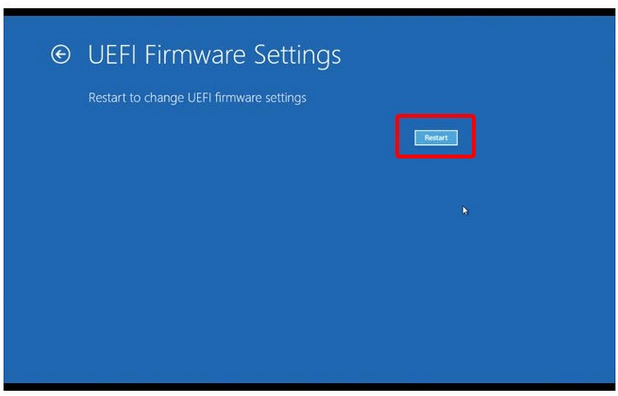
Now, click on the Restart button for rebooting your system in UEFI settings that may seem to have a similar interface as Bios.
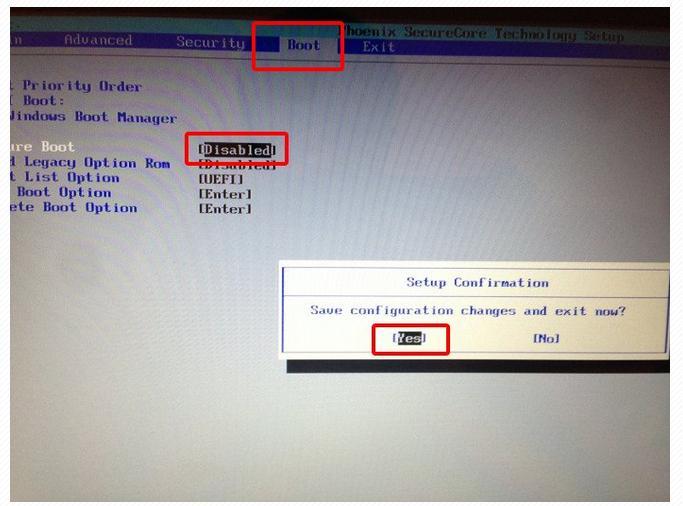
You would have booted into the UEFI utility by now. You can easily change various settings here, but you just need to disable secure boot feature for dual-booting Windows 8 with Linux.
Go to Boot tab, and find the Secure Boot option which would be set to enabled. Use the arrow key to go to Secure Boot option. Press Enter to select it. Use “+” or “-“ keys to change it. You need to confirm it when prompted. Then, hit F10 to save the changes and close the UEFI settings.
Next, you will be able to boot into Windows normally. You are ready to dual boot your system with Windows 8 and Linux OS.
It is hoped that this tutorial might have proved to be useful to disable Secure Boot feature in your Windows 8 system. From here onwards, it should be smooth sailing for you to dual boot your Windows 8 system with Linux OS.