Enable or Disable Hibernate in Windows 7 and Windows 8
Hibernate mode is recommended to conserve laptop’s battery life in most of the cases. It was quite easy to enable or disable Hibernate mode in Windows XP from Control Panel->Power Options and then using Hibernate tab settings. For Windows 7 and 8, we have to follow a different approach for sending laptop to hibernate mode. If you desire to enable or disable Hibernate in Windows 7 and Windows 8, follow an extremely easy procedure.
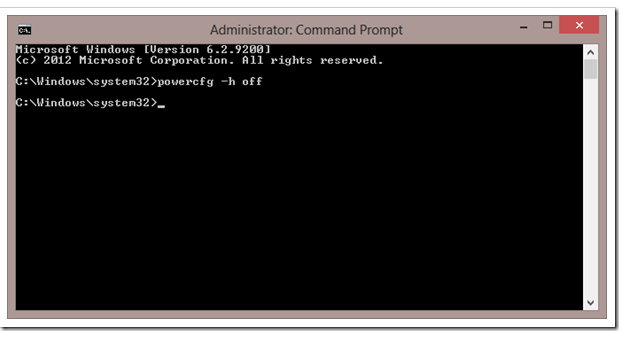
Launch Command Prompt with Administrator Rights. For launching it, type CMD in run menu for Windows 7 and in Search Charms bar for Windows 8. Then, press CTRL+Shift+Enter to open the command prompt with admin privileges.
Next, you need to type the following command press Enter:
“powercfg /hibernate on”
Type “exit” and hit Enter to close the command prompt.
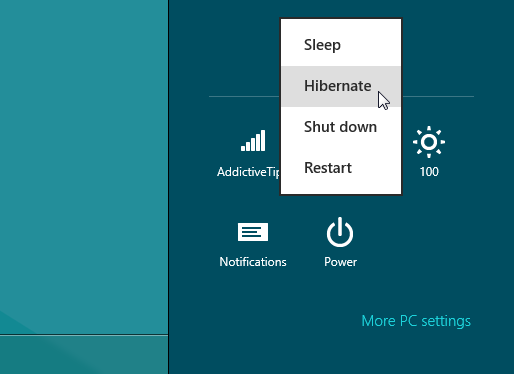
For Windows 7, you should now see the Hibernate option in the Start Menu. The Windows 8 users will find it in the Power options. If you are unable to see, then continue with the following tasks.
Type Power Options in Start Menu of Windows 7 and hit Enter. In the left pane, you need to open the link labeled “change when the computer sleeps”. Then, open the link “Change advanced power settings”. Under the “Advanced Sleep” options, you are required to expand the Sleep tree and turn on/off Hybrid Sleep. Windows 8 users can locate Power Options by exposing the Charms bar and then selecting Settings. You will see Power options there.
You can also disable hibernate mode using the same command, by replacing “on” with “off”.
In this way, you can play with Hibernate settings of your Windows PC. You just need to tweak with the settings to enable or disable hibernate in Windows 7 and Windows 8.