Enabling Client Hyper-V in Windows 8 for Running Virtual Machines
Most of you would be familiar with VirtualBox and other VMware stations that allow you to run an operating system virtually inside another firmware, without physically installing it. The Windows 8 users can also utilize the Hyper-V feature for running virtual machines in it. It is not enabled by default. This article reviews how to enable client Hyper-V in Windows 8.
It must be kept in mind that you can enable Client Hyper-V for 32 bit and 64 bit operating systems, but you can install and run it in 64 bit operating systems only. Moreover, this feature is only available for Pro and Enterprise users.
Prerequisites for Enabling Client Hyper-V in Windows 8
Your PC must have at least 4GB of RAM, and your CPU must support SLAT (Second Level Address Translation) technology. This shouldn’t be a problem on latest PCs.
How to Enable Client Hyper-V in Windows 8
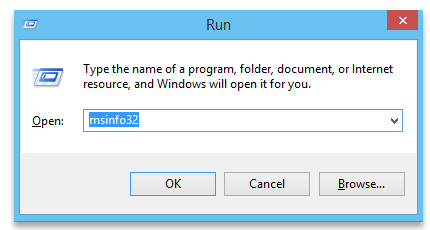
Before you enable the Client Hyper-V, you must check whether your system is ready for virtualization. For finding this out, open the Run dialog box by pressing “Win+R”, type “msinfo32” and hit the Enter button.
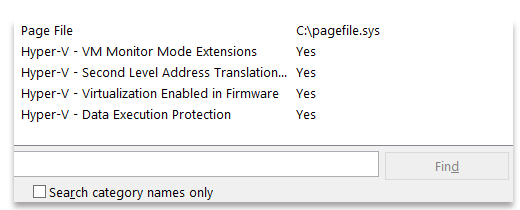
The System Information window should pop up. You need to scroll down the window. If the values shown in the window are all set to “Yes”, then you can proceed. If any of the above values are set to “No”, then it means that you need to enable virtualization in your BIOS settings. Once virtualization is enabled in BIOS, you may follow the steps mentioned below.
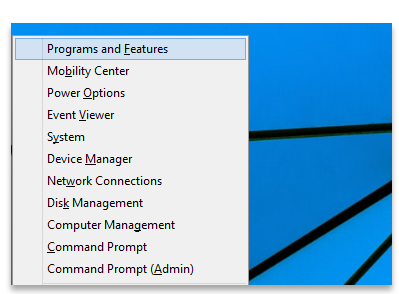
You need to press “Win+X” for launching the power user menu. Choose “Programs and Features” from the list of options.
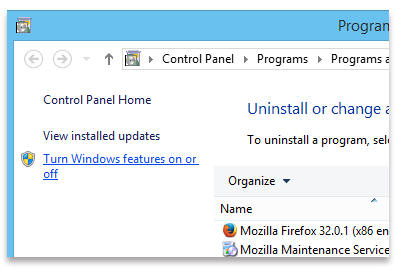
You need to click on the link “Turn Windows Features On/Off” located in the left pane for opening the Windows features.
You need to select the box “Hyper-V” and then click on the “Ok” button. If you desire, you can also click on the little Plus icon to view the enabled icons on Hyper-V.
When you click on the “Ok” button, Windows will enable all the required binaries and dependencies to the installation of Hyper-V.
Once the process is completed, restart your machine. From here onwards, you can use Hyper-V for installing and running virtual machines like any other virtualization software.
This is all you had to do to enable Client Hyper-V on your Windows 8 PC. Now, you will enjoy the virtualization of operating systems better than other VMware stations.
Comments are closed.
Add Comment