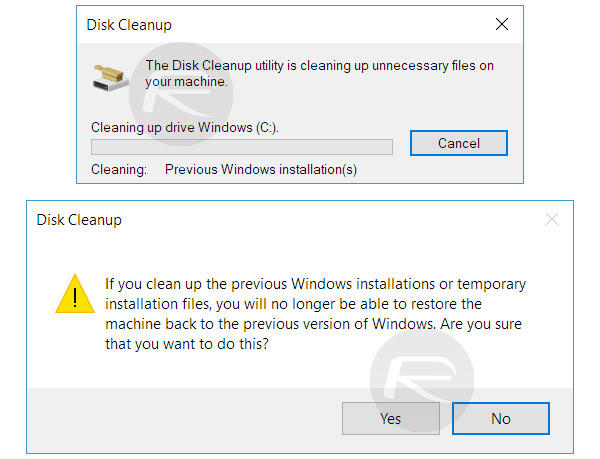
Microsoft has started pushing Windows 10 Creators Update across the world. Apart from the great features and benefits of the new Windows 10 update, there is a nifty little thing that comes along: 20 GB of free space. Windows 10 Creators update makes sure that the system frees the data of the previous installations. But you will not be able to free up space in Windows 10 Creators update automatically. There is a procedure to follow, and in this article I will delineate the process.
Free Up Space in Windows 10 Latest Version Creators Update
Using the Windows 10 search feature, open the Disk Cleanup feature. You can just type ‘Disk Cleanup’ in the Windows 10 search bar and you will see the disk cleanup option.
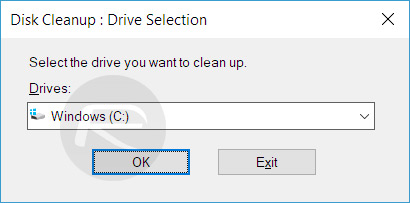
When you launch Disk Cleanup feature, it will ask you to select a disk from which you need to clean the data. Just select the C drive, assuming that’s the place where your Windows is installed. However, if you have installed your Windows in some other drive, let’s say D or E, select that.
After selecting the drive, click OK.
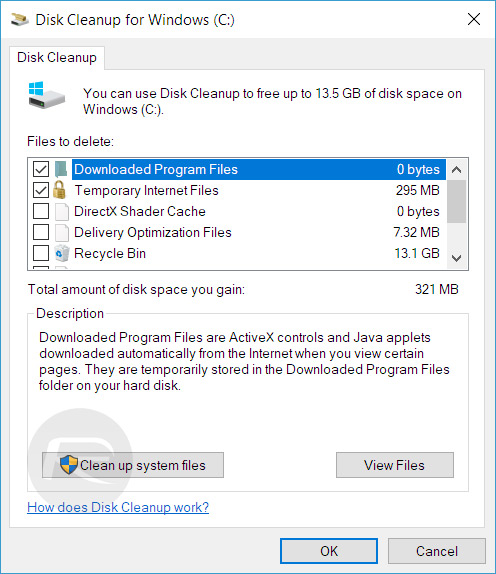
Now simply click on the “Clean Up system files” option and the system will clean up your old systems data which takes GBs of space. Make sure you don’t delete all of the data. The system should only free up space from the system files.
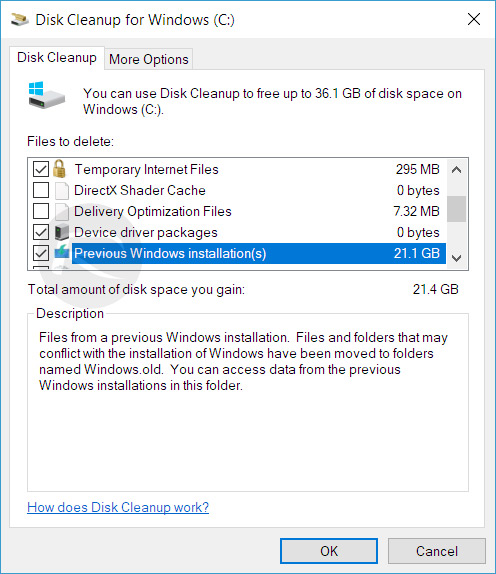
Now you will be asked again to choose a disk from where you want to delete the unwanted data. Select C or wherever your windows is installed. Now you will see a list of data items. Make sure to note “Previous Windows installations”. You will also see the space this data item takes. Just select this option and click on the OK option.
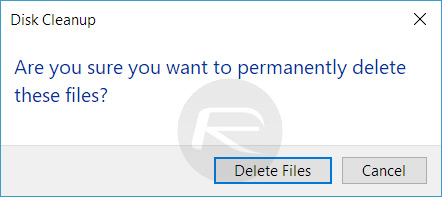
Now you will be asked to ensure that you want to delete the selected files permanently. Just click on the Delete Files button and proceed.
Now the system will start deleting the files. But soon after, you will get another warning that you will not be able to go back to the older versions of Windows after this deletion. This is because the system is deleting the old data of the previous versions of Windows. Just click on OK and proceed with the on-screen instructions.
After the data is deleted, you will see that you would have free no less than 20GB of space. This is how to free up 20GB of space in Windows 10 Creators Update.


