It’s impossible to communicate visual beauty to others on social media platforms. The 360 degree, holistic views captured by our eyes and the feelings of the scenic views have no match, and could only be experienced. But panoramic photos is perhaps the best way to upload the views of places you visit. Panorama photos capture every angle and let your friends see the real nirvana of the place where you are. In this article I’ll tell you how to upload Panoramas, or Panoramic photos on Instagram.
Swipeable (iPhone)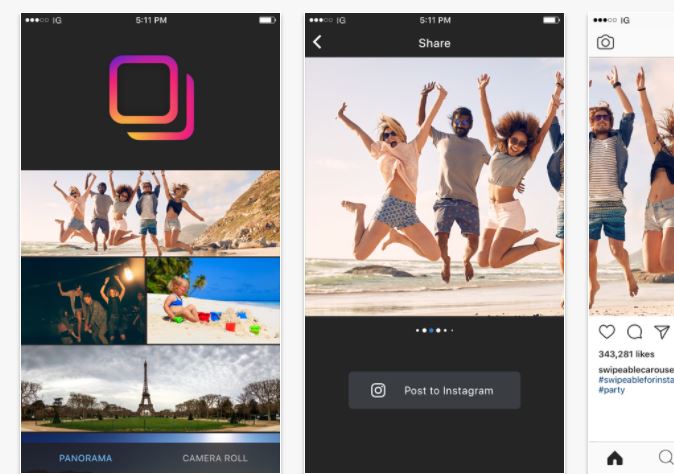

Swipeable is a great app to post panorama to Instagram. The app uses the multiple photo upload in single post feature of Instagram to allow users to post swipeable panoramas. Swipeable is available for free from App store for iPhone users.
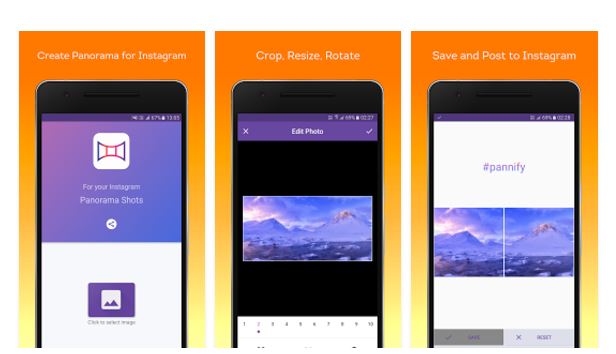
Instaswipe (Android)
If you are an Android user and want to upload panorama photos on Instagram, I’d suggest using Pannify or InstaSwipe.
Using Photoshop
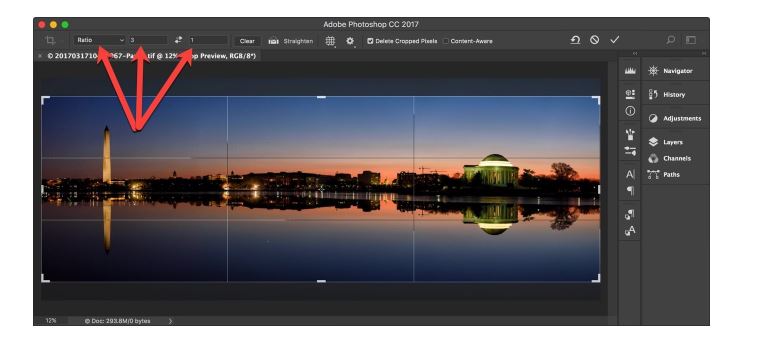
A great way to post panoramic photos on Instagram is to split the photos into tiles and post the tiles into one post (Instagram allows you to post multiple photos in one post). Your Instagram friends will be able to view the panoramic photos by swiping these split tile photos.
Here’s an example of how the end result will look like:

But how to split images to upload on Instagram? The best way is to use Photoshop. Just use the Crop tool of Photoshop. Make sure to divide the image evenly in the square shapes. You can crop the image with the ratio 1:3 or 1:4.
After cropping, you the “Slice” tool in Photoshop. You can get the slice tool by long-clicking the crop button. You will see a drop down from where you can get the slice tool.
After selecting the slice tool, click outside the image and drop around the outside of the entire image to create large slice including the whole image.
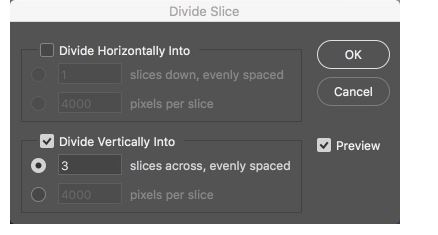
Now right click on the icons at the very top left of the slice. Select “Divide Slice” option from the pop-up menu. From the divide slice option, uncheck the “Divide Horizontally Into” box and check the “Divide Vertically Into” box. Just enter the number of slices (photos you want to upload on Instagram to give a panorama look).
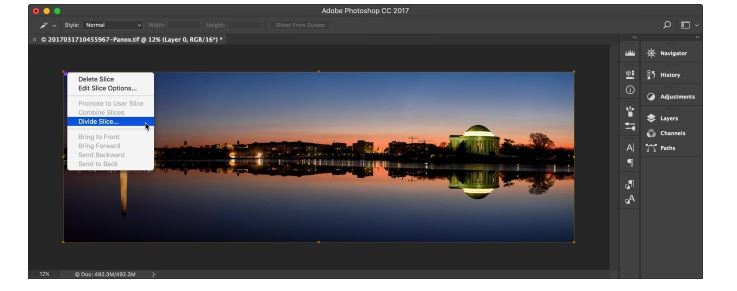
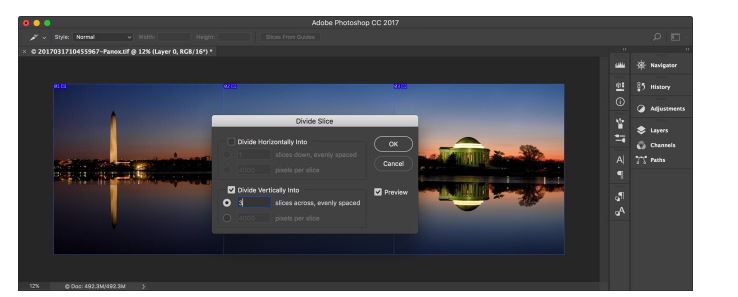
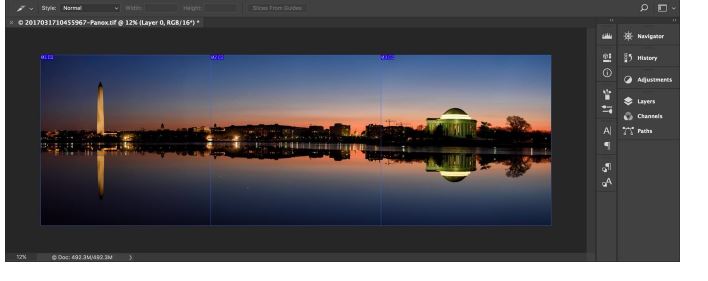

The slice will be marked in the image. Click Ok and close the Divide Slice options panel.
Now we have to export the slices as separate images to upload it on Instagram for panoramic photos. In order to do that, just head over to File-> Export-> and click on Save for Web. Now set the output size. You can set the size to 1080p. After setting the size, click on Save.
Before clicking on the save button, on the bottom left, make sure that Slices one is set to All Slices.
Now transfer the photos slices to your phone and upload them to one post.
Using Online Image Splitter
If you find using Photoshop too complex, I’d suggest using free online image splitter. This tool has a split image feature. Upload any image you want to split and divide the image.