Install and Configure Ubuntu Samba for Ubuntu File Sharing -Guide
What is Samba Server?
One of the easiest ways to network Ubuntu and Windows computers is to utilize Ubuntu Samba share functionality. The Ubuntu Samba server is quite valuable in sharing files with Windows clients. This utility converts Ubuntu into a file server for easy access from a Windows PC. It is a great replacement for Nautiilus File Manager that has limited capabilities. The Nautiilus File Manager is provided with a series of connection protocols for accessing files on a remote server. It can also accept connections from other PCs. However, Samba uses the simple file sharing protocol to enable your Ubuntu device for sharing files and folders, just like a Windows PC. Now you can access the Ubuntu folders from another Linux-based system or Windows OS. This tutorial will show you how to install Samba server Ubuntu 13.10 Salamander, and its complete functionality.
How to Install Sama Server Ubuntu?
Samba is not installed on your Ubuntu operating system.
- The first thing to do is to install Samba from Software center in Ubuntu. Search for Samba and then install the package. It may also be installed by using the following command in the terminal.
“sudo apt-get install samba samba-common”
- Now you need to install some dependencies for the package. Also install Python-glad2.
“sudo apt-get install python-glade2”.
- Now you need to install graphical interface System-config samba.
“sudo apt-get install system-config-samba”
- Add a Linux user
“adduser pirat9”
- Set a Linux password for the user.
“passwd pirat9”
- Now launch Samba configuration tool.
- Now, add the folder you want to share and grant the access to it.
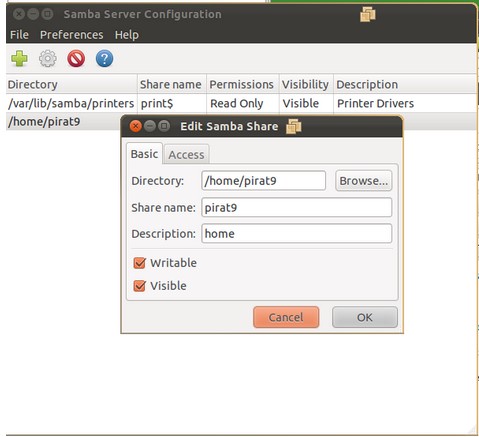
- Now, before accessing the shared folder, you need to create a Samba user on Samba server Ubuntu.
“sudo smbpasswd -a pirat9
New SMB password
retype New SMB Password”
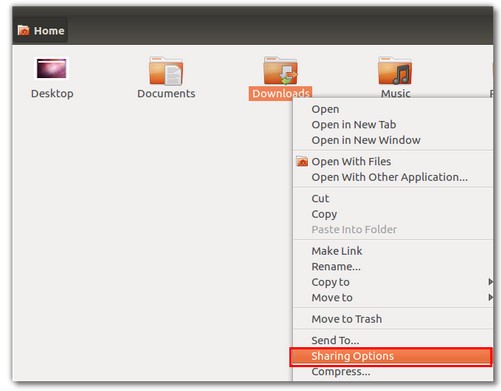
The configuration is now complete. You can now share any directory by right-clicking on it and then open the share options in Ubuntu Samba server.
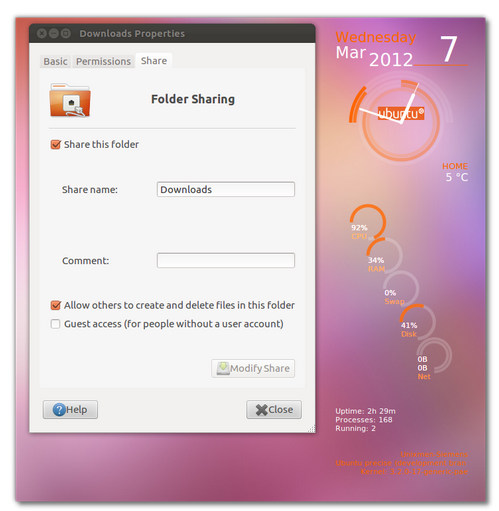
- Now, activate share
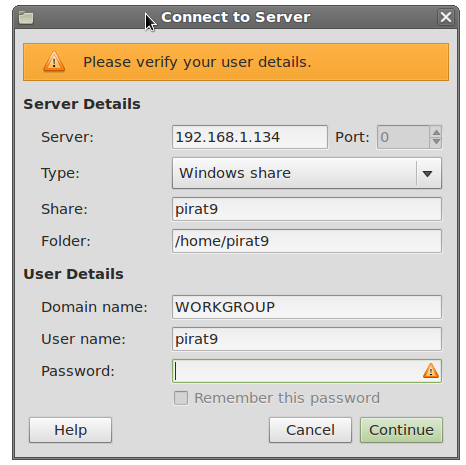
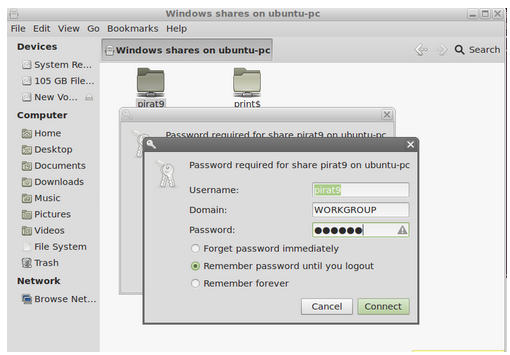
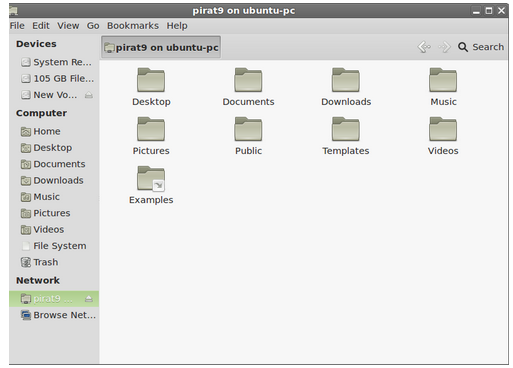
- It’s time to test the Samba server. The test is done from another Linux machine, LinuxMint12 with Ubuntu 12.04 device. From menu, open connect to the server and then type the details of your Ubuntu machine.
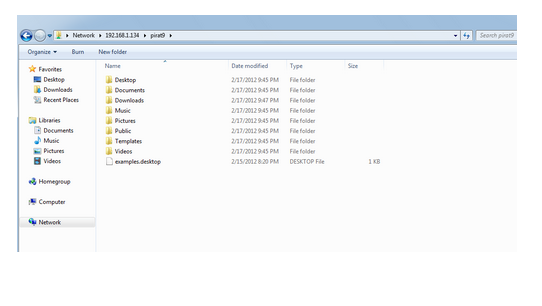
Accessing Ubuntu Samba Server from Windows
Accessing Ubuntu files from the Windows PC using Ubuntu mount Samba share feature is a piece of cake. This method works for Windows XP, 7, and Vista. Go to your Network and search for the available servers. You should be able to see your desired Ubuntu device on its IP address on the network. It will ask for username and password.
Open the shared folders and enjoy.
This tutorial might have proved to be useful for understanding the Ubuntu Samba share features, installation and configuration. If you want to configure your own Samba server Ubuntu, it might be quite easy for you now. Samba may also be integrated with LDAP server to provide an additional authentication layer in addition to containing the user, group, and device account information.