The thing about desktop PCs, they are kinda loud and tend to heat up the room, especially where there is no proper ventilation. For the loudness, I would recommend trying changing the fans for those that are quiet, but then there is only so much you can; the heavier and more apps you run, the louder the fan is going to get. For the heat, well, it never advisable to stay in a room not so well ventilated.
However, this article is going to look at how to turn off the LED lights on your desktop PC. Typically, you find two LED lights; one for the power and the other for the hard drive. It might be useful to turn them off for some users; especially people working in studios. So how do you go about it?
Option 1 – The Easy Way: Just Cover up the Lights
Not all solutions need to be technical; of course! Just get a duct tape and cover the LED lights. Sure, your computer is going to look ugly like Frankenstein being pieced together using staple pins and duct tape, but it will work. Especially if the tape is opaque enough or you do several layers to ensure the light does pass through.
FYI, there are also specialized stickers used to dim up LED lights, and would probably look less Frankenstein-ish. However, if you are looking for a more ‘beautiful’ and technical solution read on.
Option 2 – The Hard Way: The Geek Highway
First, you will need to get hold of your motherboard manual. You can always download one from the OEM’s website if you lost the one that came packed with your computer. You will need the manual since this next trick will require you to disconnect the LED wires from the system panel connector; the front panel header. The motherboard panel should look something like what we have below.
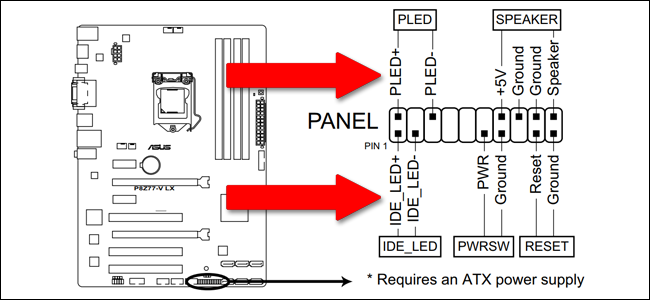
Please note, if you assembled the PC by yourself, chances are high the motherboard manual will be easy to understand. However, if you just bought the PC, the manual might not specifically focus on the motherboard. If that is the case, you will have to determine the part number of the motherboard and search for the separate manual for the system panel diagram for the given board.
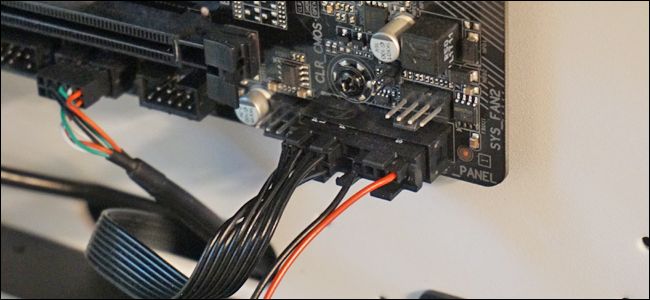
Next, we pop up the hood and get inside the PC, but before doing that, make sure you have unplugged the PC from power. Once you have opened up your PC go to the system panel connector; you having the right motherboard manual at this point is crucial. Often, it is located at the bottom or the right edge of the motherboard, at the opposite corner of the processor area.
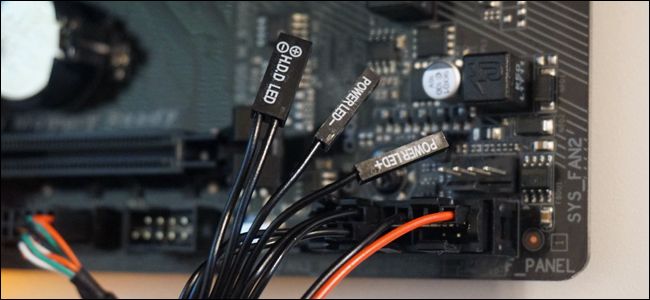
Remove the positive (+) and negative (-) cables from the power LED indicator and the drive LED indicator. They should be labeled ‘PLED’ and ‘HD LED’ or ‘IDE_LED,’ sometimes the cables connecting them to the board are also labeled the same. There are some motherboards with multiple LED lights for different states; awake, sleep, and hibernating.
To deactivate the LED lights permanently, you need to carefully unplug the positive and negative cables powering them; for both the power and hard disk LEDs. You should not touch any other cables, other than the LED cables.
Next, you should re-assemble the computer just enough to power it safely; do not completely reassemble it though. Making sure your body (or anyone else) is not coming into contact with the computer, plug it in and boot it up. The fans should start spinning, but the LED lights should not be lighting up. The power and reset switches should work fine, although they should not have the LED lights indicating they are working.
Now fully reassemble the computer and put it back into place. Going forward, you will rely on the fan and hard disk sound to know your computer is working, and you should not have to deal with issues of LED lights, lighting up where they are not needed.