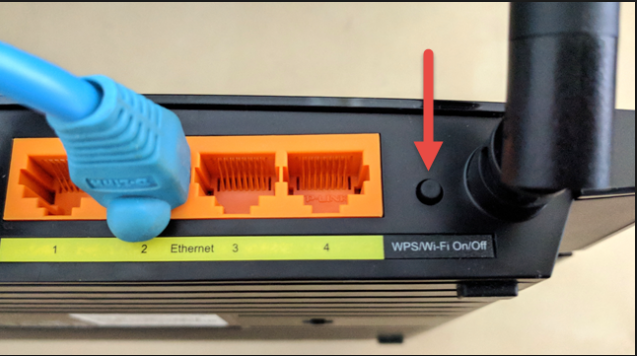
Setting up your Wi-Fi router should be simple. Given you go through the manual thoroughly just once and follow the instructions correctly. You really should not find trouble in setting up the router. You even have the WPS button for the no-brainer connection of new devices.
Virtually all modern day routers are ‘plug-and-play’ and have a simple web interface on which you can handle all the configuration to make it secure and easy to monitor. They also have manuals online you can download for more information in situations where you need to troubleshoot it and the manual it came with lacks the information.
What is the WPS button, and what does it do when I press it?
Majority of the people who have ever had to setup a wireless router have noticed and wondered about the WPS button. Well, for starters it stands for Wi-Fi Protected Setup! And it has a lot of utility. Yet sadly, not that many people use it, and those that do, they don’t use it that often.
The WPS primary function is to enable you to connect a wireless device to your router faster and easier; you will not have to search for the network SSID and then type in the password. No, with WPS, all you need to do is press the button, and the wireless device will connect automatically.
Step 1 – Press and hold down the WPS button for about five seconds.
Step 2 – On the wireless device you’re trying to connect to your Wi-Fi network, select the SSID name of the network and it should connect without asking for a password.
Devices like printers come with inbuilt WPS button. To connect it to your Wi-Fi network, first press the WPS button on your router, then next press the WPS button on the printer. There also some routers that don’t come with an actual WPS button, which means you can use the tip mentioned above.
In which case, you are supposed to use the router’s setup page where you will get an unchangeable WPS 8-digit PIN. You can then use this PIN on the device you want to connect to the Wi-Fi network.


