
Online tutorials are a form of delivery of subject matter adapted from developments in digital technology.Especially in the COVID-19 pandemic situation, the teaching and learning process is limited and directed through the Internet network.Online tutorials are very important because they can be recorded for playback whenever needed.Unfortunately, some of them are not uploaded on popular streaming sites like YouTube, requiring everyone who may need them the next day to record them manually.And the recording device needed in this case is a screen recorder.PowerPoint screen recording tools are also needed to record PowerPoint presentations for later presentation at a different time and place. There is many screen recording software available for you but one of the best is Wondershare DemoCreator.
What is Wondershare DemoCreator?
Wondershare DemoCreator is a tool for audio/video recording of PC screen on Windows platform. We put it to the test to see how it behaves in the making of the video tutorials and here are the results.
It can work on both Windows and macOS platforms
After having explored its main features, we went back to testing Wondershare DemoCreator to demonstrate how simple and intuitive it is to use for the creation of video tutorials. The screen and audio recorder, produced by Wondershare and available on both Windows and macOS platforms, is able to record the PC screen, together with system and microphone audio and webcam video.
You can do a lot of things with Wondershare DemoCreator
These peculiarities make it capable of satisfying the needs of teachers, vloggers and inexperienced gamers who intend to make presentations, tutorials, gameplay and much more. The simple and intuitive interface allows you to set the resolution, the frame size and the frame rate, after which, once the recording is complete, you can give the finishing touches using the integrated video editor. It will allow you to crop the video, change the playback speed, add comments, symbols and effects to make the content you are going to share online more enjoyable and understandable. At the end of all the operations, you can export the recorded movie in different formats including MP4, MOV and GIF and use the program for quick sharing on your favorite social media.
More customized effects
In addition to your voice, which allows you to communicate more easily, you can make use of numerous annotation tools, such as captions, speech bubbles, overlays, arrows and other colored elements that facilitate the transmission of the messages that you consider most important. This is particularly useful if you were using DemoCreator to produce presentations, video tutorials or training courses. In case you are a gamer, you can approach the gameplay with the shots taken by a camera (even external) aimed at you, so that the observer can grasp your reactions in the most exciting moments of the game you are playing.
Although the program does not require a particularly powerful computer, the manufacturer suggests the following minimum requirements for optimal operation: from Windows 7 onwards (64-bit only), Intel Core i3 or higher with at least 2GHz, 3GB of RAM (8GB for HD and 4K video), resolution starting from 1366 x 768 pixels and at least 2GB of free space for installation (SSD is recommended for editing HD and 4K video).
For a free trial, just go to the main product page, click on Free Trial and run (with double click) the installation file that will be downloaded. Later you can decide whether to purchase one of the available licenses:
Monthly Plan: You can receive automatically renew and cancel any time if you choose a monthly plan.
Annual Plan: for one PC only. It will allow you to record screen, audio, webcam, edit videos, add annotations, use cursor effects, import video, audio and images, get technical support and free updates.
Perpetual Plan: for one PC only. You will get all recording and video editing features.
How to record a presentation with Wondershare DemoCreator
1. Download the software based on the PC you are using (Windows or macOS). At first it was only available for Windows but today, macOS users are also supported.
2. Perform a brief configuration of the audio recording and webcam settings. If you want to record sound from the webcam, you can.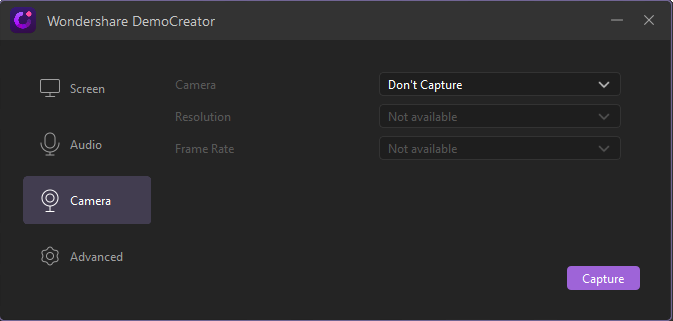
3. Record a video of the presentation. Here you can select the audio source you want.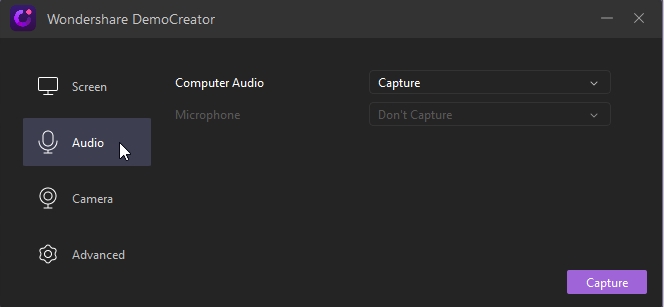
4. Select the recording area. You can record the entire screen or only part of the area.
5. You can make multiple annotations while recording.
6. Want to stop the recording process? Click F10.
7. Not very satisfied with the results? Don’t worry because you can edit it to your liking. You can add various interesting effects provided; zoom, cursor, stickers, pan, and many more. You can also trim videos, removing unwanted parts. One more thing, you can also edit the recorded audio. Very complete. You couldn’t expect a more complete tool! For a beginner, this tool is too complete.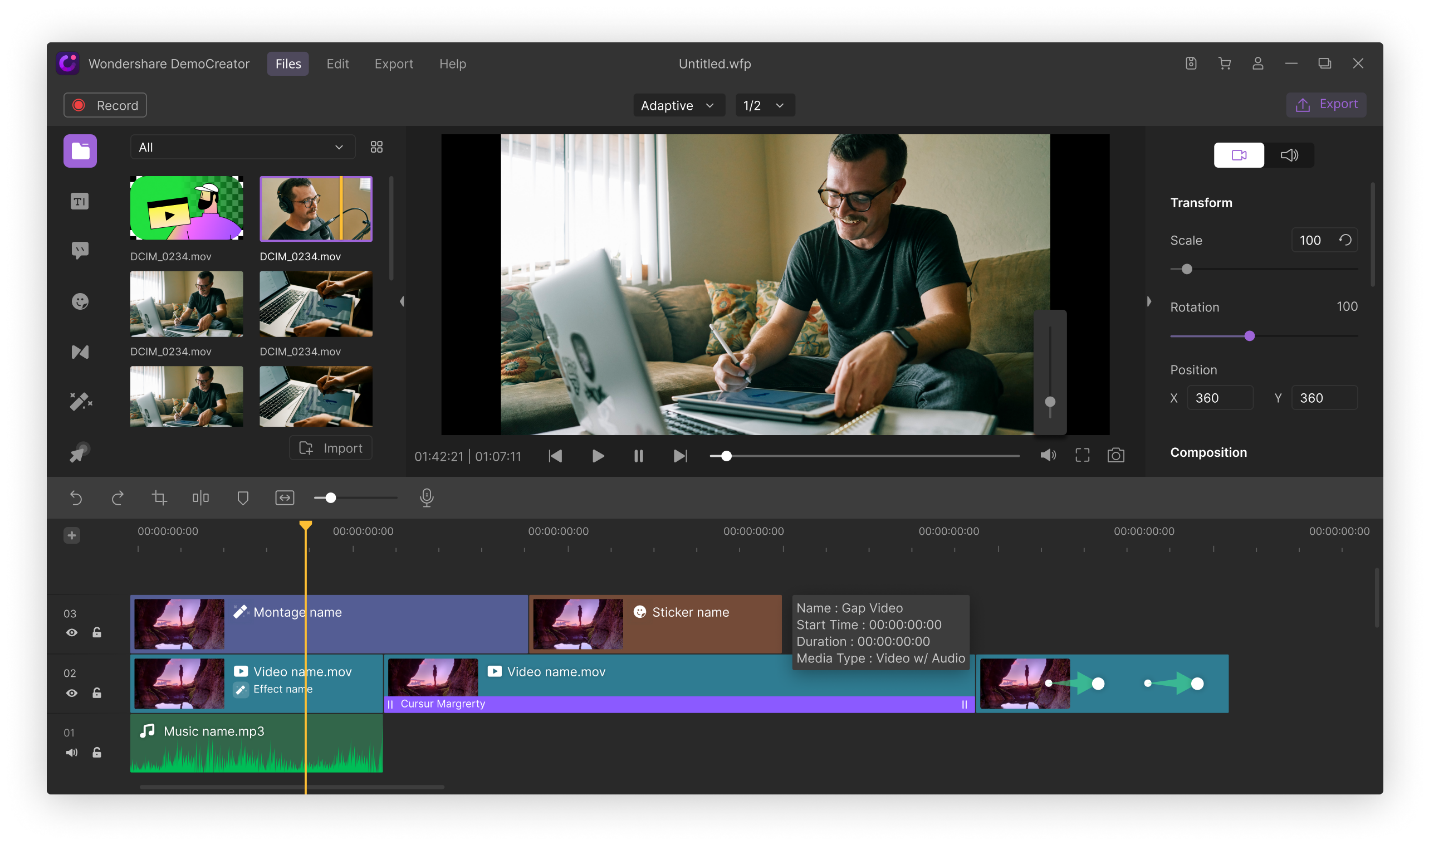
Conclusion
Online tutorials are a necessity especially in this time of the pandemic. In the future, the ability to provide online tutorials and edit them will be more needed. Wondershare DemoCreator is an all-in-one screen recorder which is not only capable of recording the screen in its original quality but also can edit it to your liking. Wondershare gives you the opportunity to try this out for free. Don’t miss it! Thank you for reading.