
PuTTY SSH Download and Install for Windows (Guide)
PuTTY is a renowned free SSH and Telnet client for Windows, developed by Simon Tatham for the Windows platform. PuTTY SSH is an open source software that is available with source code and is supported by a group of volunteers. This article shows how to install and configure PuTTY so that you can connect to your application from your Windows machine using SSH.
PuTTY SSH Download
Get the installer from the official site of PuTTY. Make sure that you install the latest packages with name something like putty-0.63-installer.exe.
Installing PuTTY SSH Client
- Open the folder in which you downloaded the installer of PuTTY SSH. Run the installer by double-clicking it.
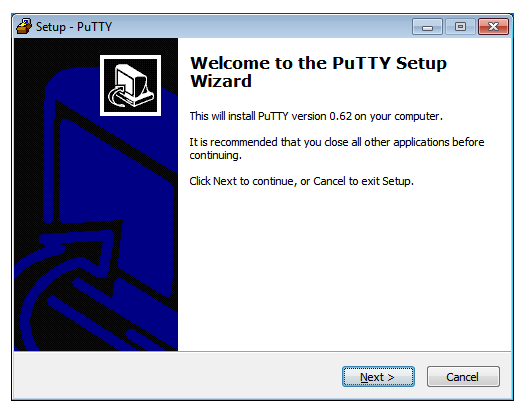
- Click Next to continue on the Welcome page.
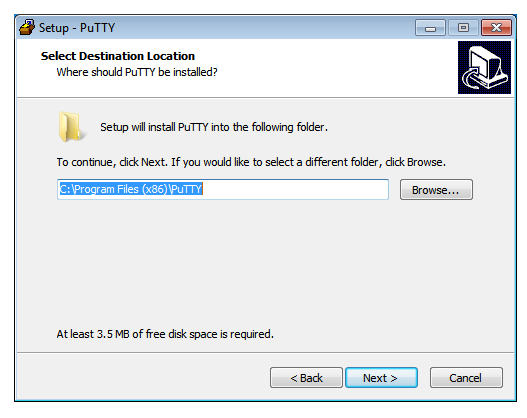
- The wizard will ask the destination to install PuTTY SSH client. Choose an appropriate folder or let it be the default.
- The wizard will ask the folder in which you want to place the PuTTY in Start Menu. Click Next button to continue.

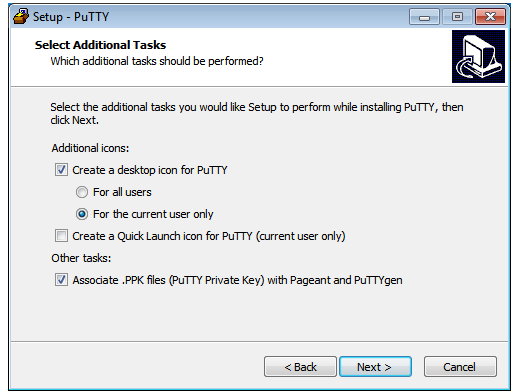
- Some further questions are asked on the way. It is recommended to keep the option of associating .ppk files.
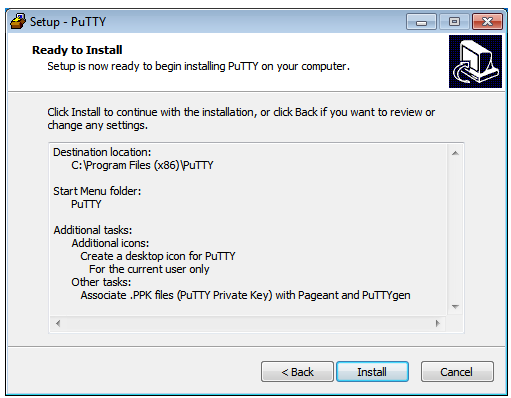
- Now, PuTTY is ready to install. Click Install button to proceed with the process.
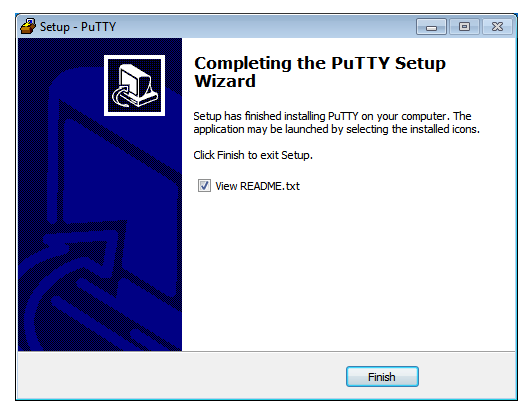
- Once the installation is complete, click the Finish button. View Read Me file for information about the software.
Importing Your SSH Key
We assume that we have an associated SSH key pair for use with OpenShift. We will import that key for use with PuTTY.
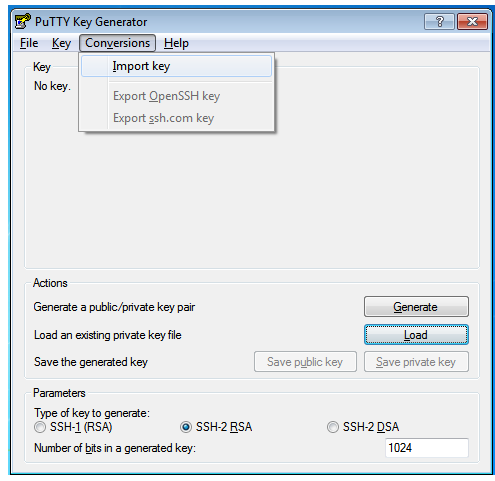
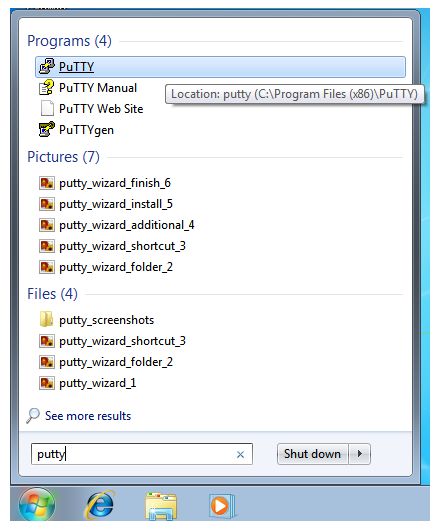
- Run PuTTYgen, the PuTTY key manager. From the Start Menu, you need to type “PuTTY” in the search menu. You will see a list of PuTTY applications. Click on PuTTYgen.

- Now import the SSH key. Once PuTTYgen starts, select the “Import Key” item from the Conversions menu.
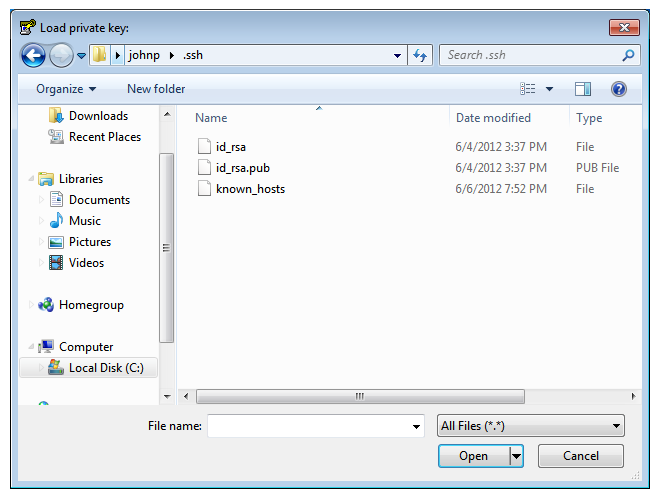
- A file dialog should pop up. Go to the .ssh directory in your user folder “C:\Users\<user name>\.ssh” and select the “id_rsa” key that was initially generated through RHC setup.
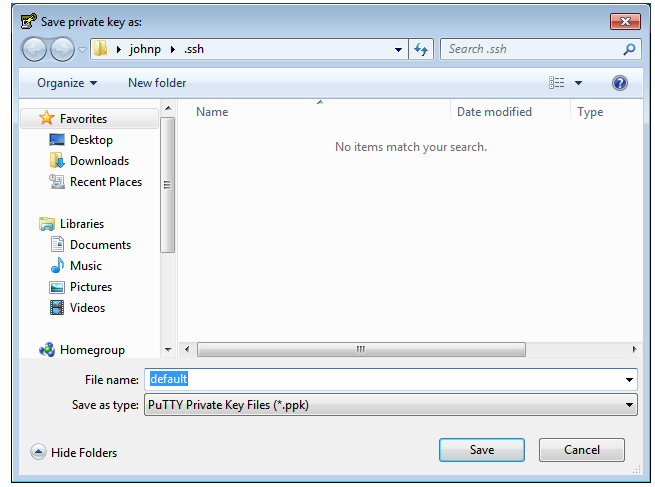
- PuTTYgen loads your key and shows it. Hit the “Save private key” button in the dialog box.
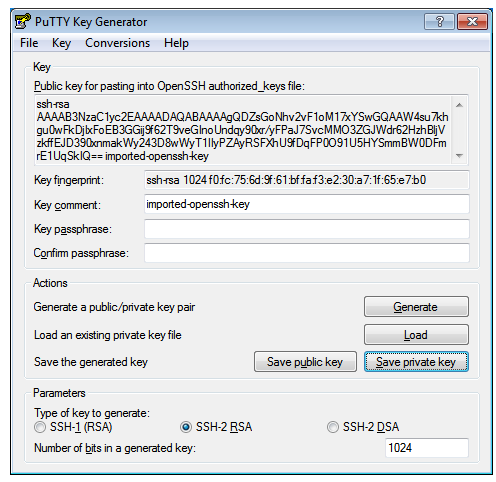
- You will see another dialog, prompting you for assigning the location to save the key. Again, go to the .ssh directory in user folder. Name the key that you may remember and make sure not to overwrite any files in this directory.
Now, you are finished with importing SSH key. You may close the PuTTYgen application.
Configuring SSH PuTTY for Connecting to Your Application
Let’s assume that you have already created an application on OpenShift. Now, PuTTY needs to be configured to it with SSH.
- Launch PuTTY SSH Client.
- Get the desired SSH address from the applications list page of the web console. Click on your application to see the details.
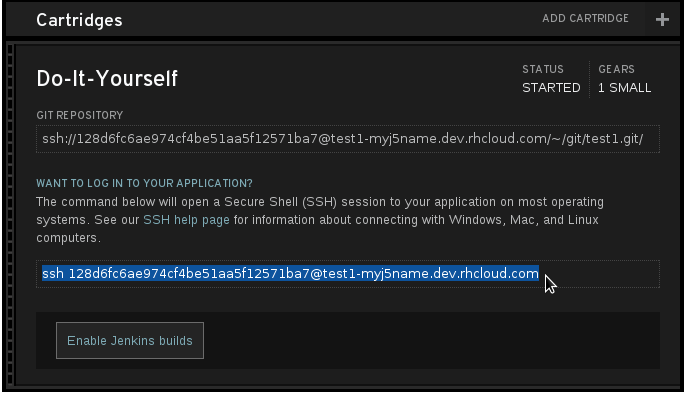
- Click on the link of “Want to log in to your application” to view the desired address.
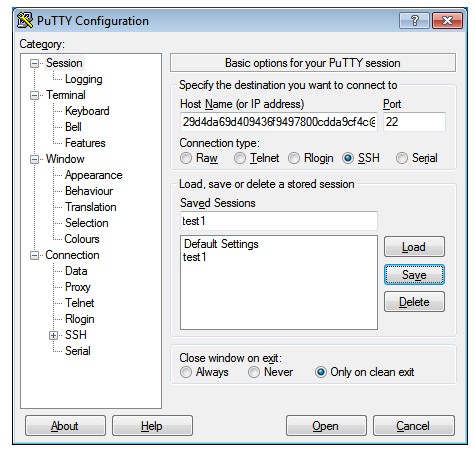
- Now, enter the address into PuTTY.
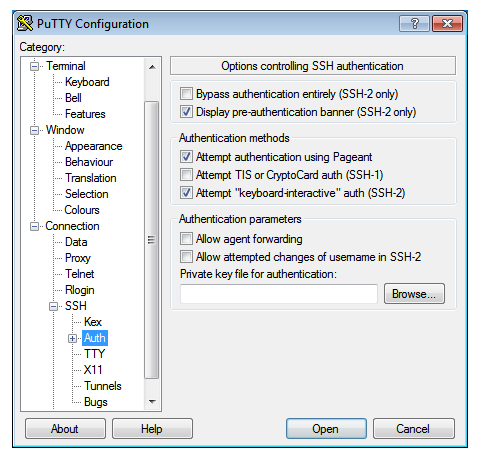
- Link your SSH key to the session.
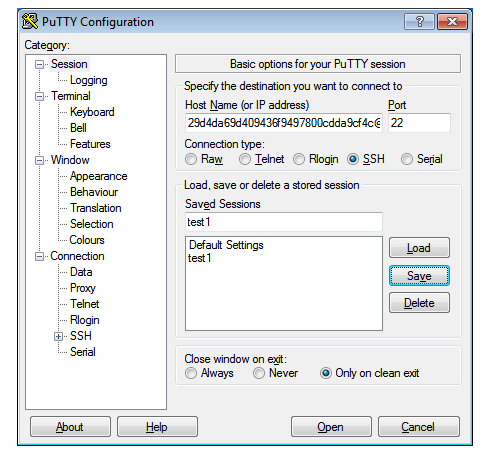
- Save your session. Click the Open button to connect to the application.
Now you are ready to connect to your OpenShift Application with SSH client on Windows.